Seafood Stew

Hello all, here’s a really easy stew recipe for those who love stew and seafood. So please enjoy, and let me know if the recipe worked out for you! I’ve also added a side dish of baked asparagus, works out great with the stew.

Seafood Stew:

you’ll need:  2-1/2 cups of vegetable broth,  6 large tiger prawns, 1 cup of bay scallops, 1 cat fish fillet sliced in 1″ cubes, 1 cup long wild rice, 3 tsp minced garlic, 2 tsp chili powder, 1 cup of red peppers sliced, 1 cup of yellow peppers sliced, 1 yellow onion sliced, 4 tomatoes cut in quarters, 1 can of diced tomatoes (keep the water), 1/4 cup of orange juice

1. In a medium sized pot, add the vegetable broth and wait for it to boil, once boiled add in the chilli powder, rice, and garlic
2. reduce to a low-med heat and allow the rice to simmer for about half an hour/when it’s tender, (keep adding a little bit of vegetable broth from time to time once the liquid is being reduced)
3. Once the rice is tender, on high heat, add in the peppers, fresh and diced tomatoes as well as the onions, let the vegetables cook in the broth
4.  Lastly, add the fish, shrimp, scallops and orange juice, and bring the whole pot to a boil
5. Add salt/pepper for seasoning
..and you’re done!

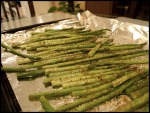
Baked Asparagus

you’ll need:  2 packs of small baby asparagus, 1 tsp of salt, 1 tsp black pepper, 2 tsp of dried mixed herbs, 2 tsp olive oil

1. Preheat oven to 250 C
2. Wash and drain all the baby asparagus, make sure they’re dry before you place them on the tin foil
3. Once the asparagus have been placed on the tin foil, proceed to add the olive oil, salt, pepper and mixed herbs
4. Place it in the oven for about 15 minutes, the asparagus should appear to be dry on the tips and a little browned
..and you’re done!

Hope these recipes will work out for you, happy cooking everyone!

& I just realized I haven’t done tracks of the day in awhile, so here’s a calming tune from The Drums  for your Tuesday night, enjoy!

On nom nom Sundays

It’s been a long time since I’ve posted a recipe, so here’s one for all you meat and steak lovers out there:

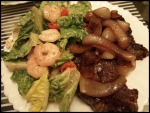
 Lemon Mixed Herb steak topped with caramelized onions and sesame shrimp salad

For the Lemon mixed herb steak,
you’ll need:

a 1/2  inch thick rib eye steak,  1 1/2 tsp garlic powder, 1 1/2 tsp black pepper, 1 1/2 tsp salt, 1 1/2 tsp dried mixed herbs (oregano, dill,  basil), 1 large white onion chopped in rings, 1/2 a lemon, 1/4 cup white wine, 1/4 cup water

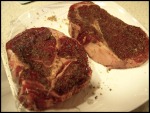
1. In a small bowl, mix all the garlic powder, black pepper, salt, and dried mix herbs, (this will be your steak marinating rub) and rub it all over the steak, let it marinate for about 2 hours
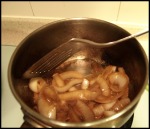
2. Once it’s closer to the 2 hour mark, in a small pan heat up 2 tsp of olive oil, and once the oil is ready, dump in the white onions and sautee for about 3 minutes or until brown, add in the white wine and water, cook until all the liquid is gone and the onions are softened and caramelized
3.  While the onions are cooking, heat another frying pan with 3 tsp of olive oil and proceed to put the steak on the pan once the oil’s ready
4. Depending on how you like your steak to be done, time accordingly. For the one I made, it was medium-rare so flip to the other side after 4 minutes
5. Once the steak is cooked, squeeze the lemon juice all over the steak and onions

..and your steak is ready, serve immediately and place caramelized onions on top.

For the salad,
you’ll need:

2 cups of chopped romaine lettuce, 1/2 cup of sliced cherry tomatoes,  1/4 cup of frozen shrimp,  Japanese sesame salad dressing, and any left over steak rub

1. In a small pot, boil 3 cups of water, once boiled put the frozen shrimp in to cook
2. Once the shrimp is ready, drain the water and let it set aside to cool
3. In a large salad bowl, mix all romaine lettuce, tomatoes and shrimp, proceed to add dressing and finish it off with any left over steak rub

…and your meal is complete!

Good luck and happy cooking :)

Retro-ish Nude

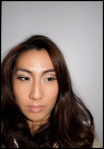
Been trying to work on a new tutorial lately, and I’ve come up with this sort of retro inspired, nude look.  It looks very simple, and it’s really easy to do.  The only problem is I’m struggling on which eye shadow technique I like better.
Have a look:

Right Eye:
Eyeshadow- taupe/grey eyeshadow applied all over the lids
Eyeliner- cat eye, with a white shimmering eyeliner applied on top, bottom liner is drawn with black eyeshadow, and white liner on the inner corners

Left Eye:
Eyeshadow- taupe/grey eyeshadow applied on the hollows of the eyes for a deeper look, a shimmering white shadow is applied on the ball of the lid to highlight the eyes
Eyeliner- just a simple tightline, bottom liner is drawn with a white liner

I’ll hopefully have this tutorial done this weekend, stay tuned :)

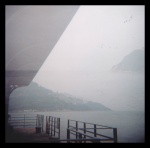
Plastic Moments: Foggy Skies

Finally got this batch of lomographs developed, they didn’t turn out so great because of the poor lighting that day. Nonetheless, enjoy!

Lush’s Cupcake Fresh Face mask: your acne saviour

This, I present you, is the Cupcake Fresh Face Mask by Lush.  And, for all you people out there who are suffering from acne and blemish troubles, this just might be your solution!

The mask itself contains ingredients such as cocoa powder,  rhassoul mud, vanilla, spearmint and peppermint oils, as well as cocoa butter.

The rhassoul mud helps to deep cleanse the skin, removing extra sebum and oil from your skin, vanilla calms redness, cocoa butter moisturizes the skin and all the minty things just help make the whole experience that much better.

How to use: Apply this mask after you’ve washed your face, leave on for 10 min. and remove using lukewarm water.

I use this mask whenever I get break outs and I find that it’s really useful, because on some days, it almost dries up my acne right after using it.  I would not, however, recommend it to those who have dry skin or to use this mask during the winter because it might dry out your skin.  If that is your concern, you could also apply it on affected areas, that way you won’t have to worry about drying out the other areas, this is especially effective for those with combination skin.  If you really need to use this mask during the winter, then put on a moisturizing paper mask as a second step after washing off the cupcake mask.  This would actually work even better because the cupcake mask helps you to clean everything out of your skin creating a fresh surface for the paper mask; enabling it to absorb the moisture better.

Price:  CDN$6.95 / 60 g , HKD$115/100 g

It’s definitely worth a try if you’ve been dealing with acne and blemishes, just remember to moisturize after using it!


Happy Cupcake-ing!

New Years Glam!

It’s almost new years eve, what’re you all gonna do to celebrate?!
Well, for today’s tutorial, I’ll be doing a new years glam look, featuring my one and only sister in law Ada Chung.
For this look, I’ll be demonstrating two different techniques to create the look.  Ada will be wearing the toned down version of the look, (suitable for those who want their make up to look less exaggerated);  and I will be wearing the full on version that will give you all the drama you need for the night!

First and foremost, prep and prime your face as always.

Eyes:
Using a synthetic brush, dab a pea size of silver gel/cream eye shadow and mix it with some white shimmery pigment shadow like so:


Mixing the pigment powder with the cream shadow will give you more shimmer without using glitter, as glitter can sometimes be really messy! 


On Ada: apply the well mixed cream shadow all over your lids, just up to the hollows of your eyes.  The shape of the eye shadow should follow the natural shape of your eyes, in Ada’s case, a circular shape.  Make sure you apply it on the inner corner of your eyes as well.

On me: apply the well mixed cream shadow all over lids, up to the hollows of the eyes and taper it to the outer corner of your eyes, creating a V shape.


On Ada: Using a dark forest green eye shadow, apply this on the crease line, and blend well.

On me: Using a dark forest green eye shadow, apply this on the crease line and taper it out to the outer V following the silver cream shadow.  Use a black pencil eyeliner, trace the outer V of your eyes.  This will create a template for you when you apply the black eye shadow later on.


On Ada: Using a black eye shadow, apply just a tad bit, close to your upper lash line, and bring it out to the outer corner of your eyes, tracing along the hollows of your eyes, (remember to blend well and that a little bit is enough as you don’t want an over powering look).

On me: Using a black eye shadow, apply it close to your lash line and wing it out to where you’ve traced the outer V with the black eye liner.  Blend well around the hollows of your eyes, make sure you don’t cover the forest green with the black. There should be a gradient of colours.


On Ada: Using the same dark forest green eye shadow, line the bottom of your eyes half way.  Line the rest of your eyes with a white shimmering pigment powder to open up the eyes.
Use a black eye liner and tight line the top and bottom lash line.
Apply a pair of natural false lashes to bring out your eyes even more.
Finish off the look by filling in your eyebrows and applying a nude lipstick so that you keep the focus on the eyes.
Apply blush and an illuminator on your cheek bones and the bridge of your nose to create that radiant effect.

On me: Apply the dark forest green eye shadow on the lower lash line, just half way and finish the rest of the liner with a white shimmering pigment powder.
Using a black pencil eyeliner, tight line the top and bottom of your lash line, with the bottom going all the way into the tear ducts, this will create a more intense look.
Apply a pair of thick false lashes to give your eyes more drama.
Finish off by filling in your eye brows, blush and apply a nude lipstick on your lips.
Don’t forget to highlight your cheek bones and nose bridge!

And your look is complete :)


In the picture above, you can see the difference in technique for applying eye shadow and how it affects the entire look.

Hope you all enjoyed this tutorial, and have a safe and fun new years eve !

The Classic Christmas Look

Happy Christmas Eve everyone!
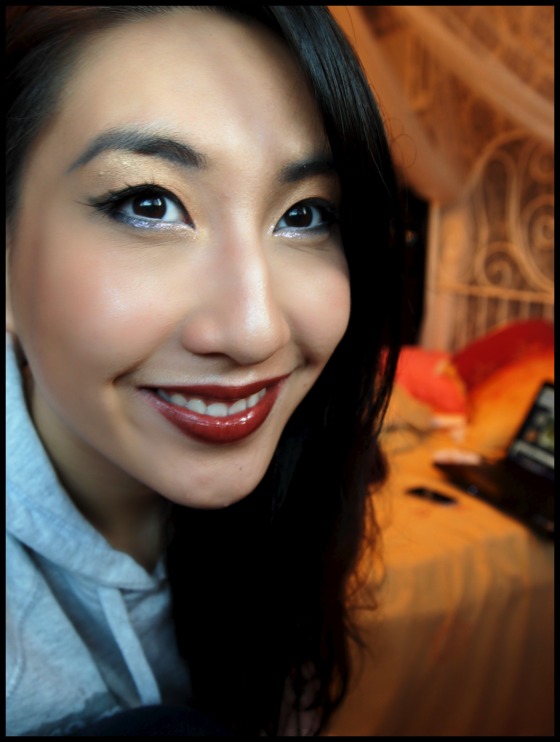
I’ve finally got the Xmas look revised and it’s a more classic look using colours of brown and black.  This look will definitely match any colour dress, so please enjoy :)


Eyes:
1. Apply an eye shadow base all over the lids.
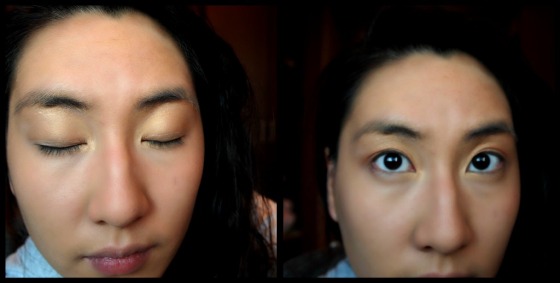
2. Using a champagne colour, apply it all over the eyelids, including the brow bone and the inner corner of the eyes
3. Now, using a shimmery peach colour, apply it on the eyelids up to the hollows of the eyes.
It should now look like this:


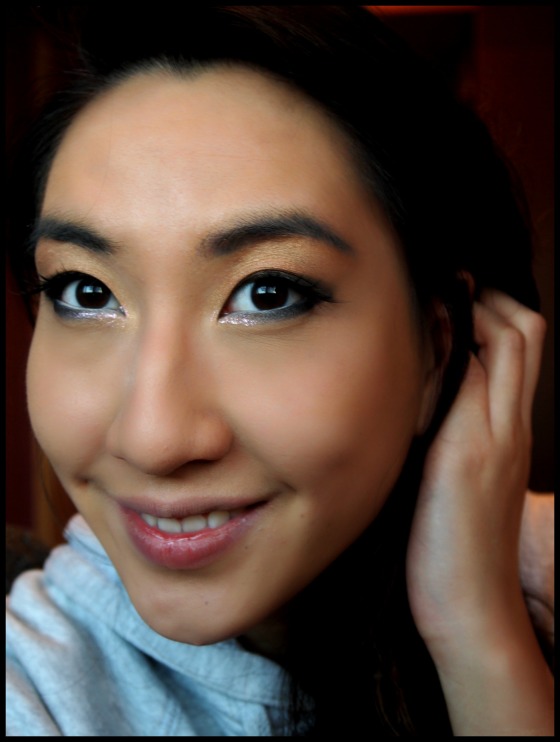
4. Using a shimmery brown, apply it on the crease of your eyes and wing it out, creating an angle at the outer corner of the eye:


5. Using a black eye shadow, apply it on the innermost part of your eyelid, (close to the lash line), and wing it out, (following the brown).


6. With a black pencil eyeliner, tight line the upper lid.
7. With a white pencil eyeliner, line the bottom water line all the way.
8. Using the same black black eyeliner, line just outside of the white eyeliner you’ve made, (this will create the illusion of larger looking eyes)
9. For a more dramatic/smoky look, apply black eye shadow on the bottom liner where you’ve applied the black pencil liner.
10.  To create brighter looking eyes, use a shimmering white eyeliner, and dab a bit of it on the inner corner of your eyes.
It should now look like this:

11. Using a dark grey eyebrow pencil, fill in the brows according to your own shape.
12. Apply demi lashes to enhance the winged eye shadow look.

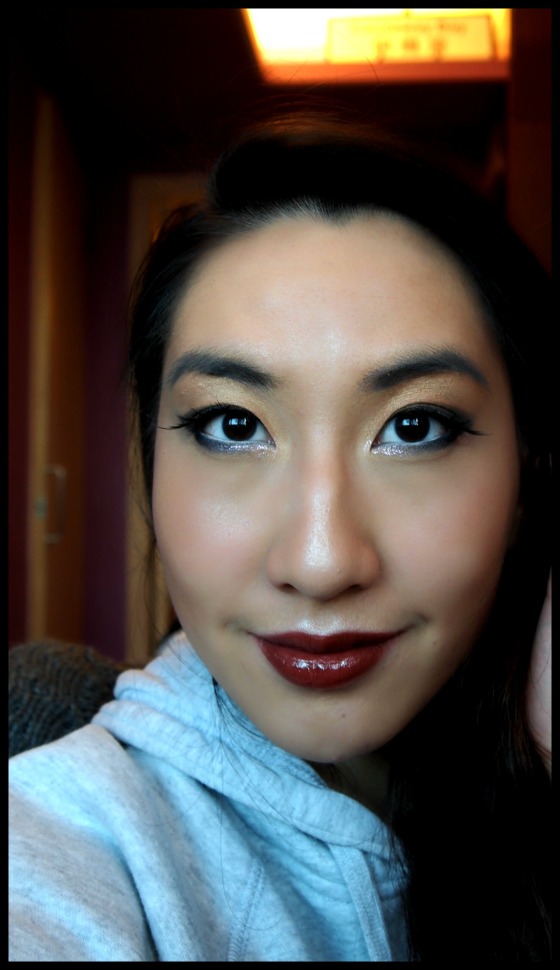
13. Apply a dark red wine lip stick.
Tip: To create luscious and fuller looking lips, dab a bit of white shimmering eye shadow/highlighter on your cupid’s bow, (the two upper corners of your lips).
14. Highlight and contour to bring out the features of your face even more.
15. Apply your favourite blush to finish off the look.

Your look is now complete and ready for Christmas!

Merry Christmas <3

Fast and easy ways to save your skin during winter

I’m sure we’ve all been victims of dry skin at some point in our lives, especially now that winter has arrived.  So I’ve got a few tips and tricks that you could use in your daily beauty routine that could save your dry skin in minutes and inexpensively!
All you need are two things: baby oil and olive oil.

Baby Oil:
I figured this little trick back in the years when I used to live in Toronto where the winters were much harsher than the ones in Hong Kong.  All you have to do is add a few drops of baby oil into your body wash that you use to shower, mix it together and soak up a lather all over your body; rinse off.

 This is a great way to keep your body moisturized while cleaning, as a lot of body washes out there can easily dry up your skin, it’s also great on sensitive skin as baby oil itself is very gentle and is often odorless.  You’ll definitely notice your skin being softer and smoother post shower!

I was also told by my tattoo artist that baby oil is the best type of oil to apply onto your tattoo during the healing process as it prevents the wound from being irritated because it relieves the itchiness and dryness that results from the healing of the tattoo.


Olive Oil:

You’d be surprised as to how versatile this natural oil actually can be.  Not only can it be used for cooking, but it’s also great as a natural skin moisturizer, an eye make up remover, hair conditioner..and the list goes on.

Using Extra virgin oil would be the best as it’s oil that results from the first pressing, meaning it is less processed and therefore retains the most nutrients from its original fruit.

To heal dry skin, apply a few drops of olive oil all over your body post shower, paying attention to areas that are extra dry.   It is best to do it while the skin is still damp as the moisture on your skin helps absorb the oil better.

This oil also doubles up as a make up remover, and hair treatment.
To use as an eye make up remover, just simply add a few drops of it onto a cotton pad, and wipe off.  Olive oil is gentle, and therefore suitable for the delicate skin around your eyes.  If you’re worried that it might be too oily for your eyes, just simply wipe it off with luke warm water to get rid of the excess oil left on your skin.
Olive oil is also great for dry and flaky hair scalp, just simply massage the olive oil into irritated areas to relieve itchiness.

There you have it, a few easy and inexpensive ways to keep your skin moisturized  and happy throughout the winter!

my top 5 beauty picks atm

So Christmas is rolling around the corner, and if you’re still thinking about gifts for your girlfriend, or best friend, I’ve got some ideas for you!  Being the product person I am, I’ve actually tried a lot of different skin care products, hair care products, make up ..and the list goes on and on.  So I figured it would be nice to share with you all my favourites out of the bunch.

1. Lush’s Big Shampoo

Intended for: people with limp and greasy hair
Price: $24.95 CDN/$189.00 HK for a pot (usually lasts for about two months when I use it everyday, you only need a dime size)

I felt like I found gold when I used this shampoo because I have VERY limp hair and volume is basically non existent. At about two years ago I gave this shampoo a try and it has been one of the best hair products I’ve used so far.  Its main ingredients are sea salt and lime juice, so the texture of this shampoo is actually really grainy.  The sea salt helps keep your hair soft, while the lime juices cleanses your hair, removing build up and gives your hair a great shine.  You’ll definitely feel the difference with this shampoo after you rinse off, because it actually leaves your hair feeling squeaky clean and I loooveee the smell of this shampoo, it’s quite citrus-y, and you’ll notice it throughout the day.  I’ve also noticed that my hair was less oily, and felt a lot more weightless.   I would, however, not recommend this product if you have really dry hair as it could make dry it out even more.

2. Clinique’s Clarifying Lotion 2 (Toner)


Intended for: people with combination-oily skin
Price: $ 21.oo US (400 ml)/$270 HKD (400 ml) (lasts for a really long time, I’m still working on it..)

This is part of Clinique’s 3 step skin care program.  The toner itself is great for those with combination-oily skin.  It contains a little bit of alcohol, but it is gentle enough to be used on the face.  I was surprised when I used it the first time because even after I had cleaned my face with a cleanser, I was still able to wipe off brown residue on my cotton pad soaked with this toner.  It’s definitely a great buy as it really picks up on the dirt and left over residue on your face.  It’s also fragrance free, perfect for those with sensitive skin.  However, if you have really dry skin, then you might opt for the # 1 (these toners range from 1-4, with 1 being the most mild; suitable for dry and sensitive skin, while number 4 is suited for those with very oily skin types).  It’s definitely a great buy and economical.

#3  MAC’S Fortified Skin Enhancer


Intended for: those with dull skin and needs a boost in radiance
Price: $30.00 US/$290 HKD

If you love glowing skin, then you gotta love this primer.  It’s basically one of those primers where you could either use alone, or under a foundation.  What I love about it, is that it’s got sunscreen, and you can really see your skin radiating after you apply it.  It’s a little bit tinted, but it definitely won’t leave your skin feeling too pale.  After using it, it keeps my make up together throughout the day, and most importantly keeps my skin glowing.  It’s a bit pricey, but you only need a wee bit of it every time, therefore, a tube like that could last you for a good 2 and half months or so.  It also comes in 4 different shades depending on what your skin tone is.

#4 Clinique’s All About Eyes


Intended for: those with dark circles, puffy eyes and dry skin
Price: $29.00 USD / $ 260 HKD

Although I haven’t seen much of a difference in my puffiness, I did notice that it has really hydrated my skin around the eye area.  I have relatively dry skin under the eyes, and because of that, wrinkles have started to develop.  However it has been better after using this product, as it really hydrates the skin around it.   I would especially recommend this eye cream for those who need a light but moisturizing eye cream.  The texture of this cream isn’t too heavy and perfect for those who are prone to developing white heads around the eye area, ie myself.  It’s also very soothing, so when you use it in the morning, it sorta wakes you up from your sleepiness!

#5 Laneige’s Water Bank Essence


Intended for: all skin types, esp those who need a boost in hydration
Price: $310 HKD for 60 ml (I’ve been using it for a month, and I still have 3/4 of it left)

This product worked really well for me as I felt that the moisture and hydration it gave me, lasted throughout the night, (when I applied it before sleeping) and through the day, (when I applied it in the morning).  It has a watery texture and when you apply it, it’s really soothing.  For those who have dry skin, you can use this essence first and then apply your moisturizer on top for a better effect.  It definitely wasn’t sticky or oily, it just made my skin feel like it was surged with water and gave my skin more elasticity.  It’s also a great product to bring with you on the plane as it hydrates your skin through long hours.  I would however warn those with sensitive skin about this product, as it contains a strong fragrance.

Hope this will benefit you all in choosing your Christmas gifts this year.
Happy Christmas shopping everyone :)